So, let’s say you have a partner who just bought a vacation home she’s not at most of the time, yet wants to keep the lawn and garden watered. How to do that? Well, you pay the neighbor’s kids to water, but let’s say you’re a computer geeky type so it’s time to boss some machines around.
The easy thing to do is get one of these. A fully built system you can buy, install and maybe modify. But what if you’d like to learn how to build your own? That’s where the SprinklerPi comes in. It’s a learning journey involving soldering, Python and web sites. Are you in?
What we are doing here is very simple. An on/off switch we can flip from anywhere on the internet. We tell a GPIO pin on a RaspberryPi to light up, which opens the hose valve, and then we turn it off. That’s all. I’ve also added an old USB camera so it takes photos when you want to see what your back yard looks like and also a sensor for temperature and humidity.
What do I need?
- A web site to host the HTML and PHP files that send commands to the system.
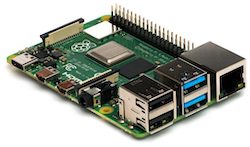
- A Raspberry Pi with a recent version of Python.
- A powered valve that opens and closes the water connection, and related hoses and connectors.
- A breadboard and related electronic components that make up the valve controller. Also, a soldering iron and the ability / interest to assemble the controller.
- Of course, a reliable internet connection at home so the SprinklerPi can reach the web, and some device that runs a web browser so you can send it commands.
How does it work?
The rPi is the heart of the system. Using Python and a series of shell scripts in crontab the rPi continually reaches out to your web site to both check for sprinkler commands and to upload a current photo and environmental conditions. To get around having to setup a way to directly connect to the inside of your home network from the general internet (a security issue) the rPi uses curl commands to move the files it uses.
To turn on the sprinkler, you point your web browser to the site you’re hosting the SprinklerPi control pages on, enter the number of minutes you want the sprinkler to run and press submit. There’s a short delay until the rPi checks for new commands, if you’ve turned it on, the valve opens and your sprinkler runs until the time you’ve entered runs down and the rPi closes the valve.
At any time you can also use the web site to check out the latest photo from the camera and check the temperature and humidity. The system is built to be modular and I look forward to adding on additional sensors and controls.
Ready to water the garden from the comfort of the Internet?
So what am I really getting myself into?
On the software side you’ll need the ability to copy files to your web site, some basic knowledge of how to edit HTML and work with web sites is helpful here. It’s not hard to get a fully-built rPi if you don’t want to roll your own. You’ll need to be able to do some simple file editing to setup the rPi, being able to read and edit some Python is also helpful but not necessary.
Building the board that actually turns the water valve on and off is a project unto itself. It takes soldering and patience to assemble the electronics. I have basic, but not impressive soldering skills. Took me a while to get it assembled properly. Here are the instructions I followed:
https://www.instructables.com/Raspberry-Pi-Controlled-Irrigation-System/. Ben’s system also includes code that will check the local weather for you and automatically turn the sprinkler on if you desire. I decided I wanted manual control.
There are three important parts to this system. Click each link to explore more:
To get ahold of the files, please visit my Github account here.