Here’s my problem: in my home office I bounce between a desktop and three laptops and in the interest of speed-of-getting-things-done I end up saving files and downloads on whatever machine I’m working on instead of taking the extra seconds to make sure I’m connected to the file share on the Mac Mini and save them in one place. Also sometimes I’m on the road and can’t reach the file share anyway. So I end up with files scattered all over the place. Sure, there’s perfectly fine commercial services like Dropbox, Google Drive, Apple’s iCloud and all kinds of others but I get tired of being bugged for money. Sure, write ‘m a check and it’s job done and be happy (actually I do use a lot of Google services), but I happen to be the kind of guy who likes to both have more control and learn a few things along the way.
Enter ownCloud. OwnCloud offers a number of features, but the one that’s important to me is how you can run your own server that synchronizes your files across all the machines you want them to appear on. That also means I’ve got my stuff even when I take the laptop and run off, which then syncs my changes when I get back. Why run it on a Raspberry Pi? Easy:
- It’s cheap
- It’s really small and consumes very little power
- It’s fun to play with, and I’m working on other rPi projects so every bit of practice builds my clues for other things I’m working on
If you’ve read this far it’s probably because you’re interested in the same thing and have discovered that the ownCloud installation instructions don’t cover the rPi. Their documentation is good, but it’s aimed at actual system administrators working for hundreds to thousands of users, and not the home user working with a popular, but fringe computing platform. So the process needs to be tweaked to get it to go. These instructions aim to help someone with at least a minimum of knowledge of the rPi and is willing to edit configuration files and do things on the command line.
What you’ll need:
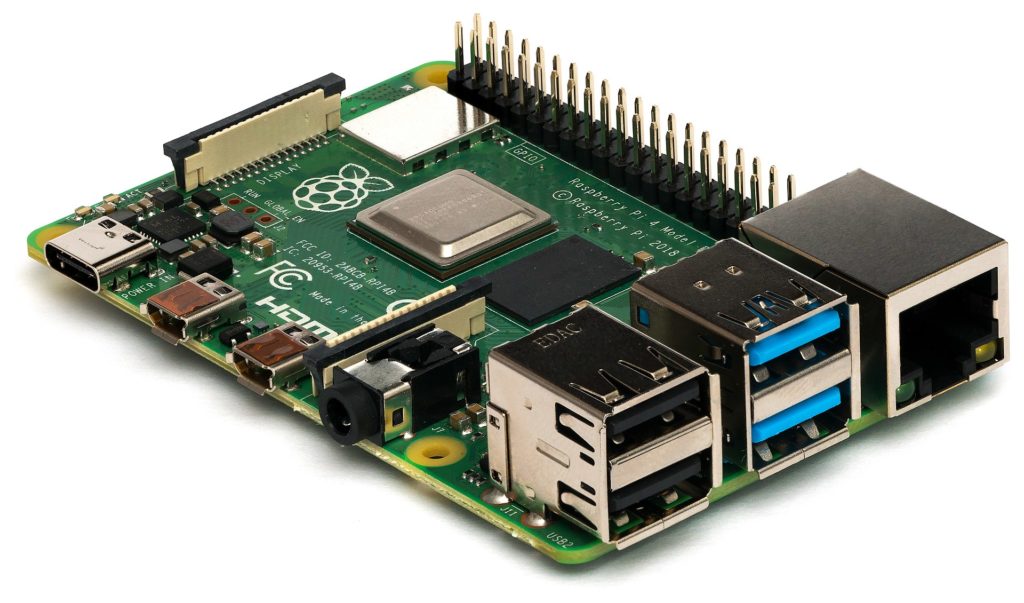
- A Raspberry Pi. There are many options depending what else you plan to do or not do with it. I went with a Raspberry Pi 3 Model B+, sort of the middle of the price/power options as of this writing.
- A micro SD card. You can probably do this on a card as small as 8gb, but I chose a 64gb card as I’ve decided to host all my files on the same drive as the rPi OS. Why? Well, you can have your ownCloud files attached to your rPi on an external USB drive of any size, but that’s another thing to power and another box on my desk. Also, I’m concerned with lots of small files, not big video files and the like so I don’t need a gazoongabyte of storage.
- A power supply and possibly a case for your rPi. There’s endless options for this. I chose a Miuzei Raspberry Pi 3 B+ Case because it’s see-through, has an on/off switch and a tiny silent fan. There’s no a/c here and the peak of the summer can be hot.
- If this is your first rPi setup experience, you’ll also need a keyboard, mouse and monitor. Once it’s running you boss it around with VNC and/or SSH and put away these things.
Got those things? Great! Let’s get started.
Choose an OS for your rPi and burn it to your micro SD card. There’s enough potential options to keep you busy trying them out, which I did and ultimately decided to stick with Raspbian (now known as Raspberry Pi OS), which is the most-used rPi OS.
Installed required ownCloud packages. For more details on on many of these steps, reference the ownCloud installation documentation on Ubuntu, which is similar to Raspbian. To do this you’ll need to plop text commands into a terminal window. Read this if you need to learn more about how to do that.
sudo apt-get update
sudo apt install -y apache2 libapache2-mod-php mariadb-server openssl php-imagick php-common php-curl php-gd php-imap php-intl php-json php-mbstring php-mysql php-ssh2 php-xml php-zip php-apcu php-redis redis-server wget
Install ownCloud recommended packages. As of this writing, not all of the recommended packages will install on Raspbian, so these instructions cover installing the ones that do. Seems to run fine without the non-working ones, though YMMV.
sudo apt install -y ssh bzip2 rsync curl jq inetutils-ping smbclient coreutils php-ldap
When this command runs, it will pop up a screen which will ask, “Modify smb.conf to use WINS settings from DHCP?” Unless you know (and/or care) what this means you can just answer NO and not worry about it. Now the basics are installed, and you should see the default Apache web server startup screen if you (while you’re on the rPi desktop) go to http://localhost.com you’ll see that indeed, that piece is working!
Configure the Apache web server for ownCloud. This setups ownCloud as the default thing to go to when you point your web browser at your rPi. More advanced users out there may choose to set this part up a bit different.
sudo sed -i "s#html#owncloud#" /etc/apache2/sites-available/000-default.conf
sudo service apache2 restart
Setup the ownCloud web server configuration. This command will open the Nano text editor. Feel free to use any text editor you like.
sudo nano /etc/apache2/sites-available/owncloud.conf
Enter this text into the file and save.
Alias /owncloud "/var/www/owncloud/"
<Directory /var/www/owncloud/>
  Options +FollowSymlinks
  AllowOverride All

<IfModule mod_dav.c>
  Dav off
<IfModule>

  SetEnv HOME /var/www/owncloud
  SetEnv HTTP_HOME /var/www/owncloud
</Directory>
Setup a database for ownCloud. We’re using MariaDB here, which is pretty much MySQL for #reasons. As this is running on a server on my network, I decided to run the secure setup as detailed here.
sudo mysql_secure_installation
You’ll be asked a short series of questions:
- Press enter to continue (no password by default)
- Then type “Y” to set a new password, and enter the password of your choice
- Now, press “Y” three times to:
- Remove anonymous users
- Disallow root login remotely
- Remove the test database
- And finally, press “Y” again to reload the privileges
That’s it, this time MariaDB is ready to use with to root login. Or so you’d think!
At this point we run into another one of those issues created by juggling so many slightly different open source projects run by different people while we are working to rig up our own slightly special thing. The ownCloud will not be able to log into the database server at this point for reasons, but we’ll follow these instructions to fix that.
sudo mysql -u root -p
Now you’ll be at the command line of the MariaDB (MySQL) server. The next series of commands are in that syntax, and you’ll notice that it doesn’t process a command until it ends with a “;” character. First we’re going to switch to the mysql database itself and set the plugin to mysql_native_password for the root user.
USE mysql;
UPDATE user SET plugin='mysql_native_password' WHERE User='root';
FLUSH PRIVILEGES;
We need to change the root password for this to work. You can use the same one if you’d like.
ALTER USER 'root'@'localhost' IDENTIFIED BY 'YOUR-PASSWORD-HERE';
Ok, now we can exit MariaDB by pressing control-d or typing exit.
Next we restart the database server:
sudo systemctl restart mysql
Ok, now we log back into MariaDB and continue the database setup.
mysql -u root -p
It will ask for the root password you set above. Now we’re going to create the ownCloud database and database user. NOTE: we are just setting this machine up for ownCloud. Down the line if you want other services and users on this machine you may want to fiddle with the users and permissions.
create database owncloud;
grant usage on *.* to owncloud@localhost identified by 'YOUR-PASSWORD-HERE';
grant all privileges on owncloud.* to owncloud@localhost ;
If you did that properly and didn’t generate any error messages you should be ready to go. Let’s test it by pressing control-d or typing exit to exit MariaDB and try logging in to the database:
mysql -u owncloud -p'YOUR-PASSWORD-HERE' owncloud
No error messages? Excellent! Now exit the database server by pressing control-d or typing exit.
Enable Apache modules. The second command there restarts Apache.
sudo a2enmod dir env headers mime rewrite setenvif
sudo service apache2 reload
Install the ownCloud software. Yes, all the above was just to get to the point where we are ready to download and get ready to install/configure ownCloud. The tar command below may take a bit to run, so be patient. At the time of this writing the ownCloud server version is 10.7.0 and this (and the file name) will change as we march into the future, so you may have to look up the current one if the file isn’t found when it tries to download.
cd /var/www/
sudo wget https://download.owncloud.org/community/owncloud-10.7.0.tar.bz2
sudo tar -xjf owncloud-10.7.0.tar.bz2
sudo chown -R www-data. owncloud
You can delete the tar archive file:
sudo rm owncloud-10.7.0.tar.bz2
Setup an ownCloud admin account. We are here! OwnCloud should now be running! On the rPi desktop go: http://localhost
- the admin user name you’d like
- an admin user password
- you can leave the ownCloud file data folder as-is for now and fool with it later if you feel the need
- database user: owncloud
- database password: YOUR-PASSWORD-YOU-SET-EARLIER
- database name: owncloud
- host: localhost
Now you can log into the ownCloud web UI with the account you just set up! Go ahead and poke around. Personally, I like to setup user accounts separate from the “admin” accounts, but you don’t have to if you don’t want to. Next:
Setup the ownCloud client. First, click here to download the right package for the machine you’re going to use. (You’ll quickly discover that the Linux client software does not work on Raspian. However, you can still use the web UI in ownCloud if you want to access your ownCloud files on your rPi desktop.) Then follow the instructions for setting it up. If you haven’t previously figured out the IP address of your rPi, run this command:
ifconfig
Your IP address should be near the top of the output and look something like this: 192.168.0.51, though this set of numbers will most certainly be different depending on your local area network setup. You may also see something like: 10.0.0.11.
You can test this by sitting at a computer which is not your rPi and going to: http://<that IP address>
Save some files, and watch it sync. I’ve set up the ownCloud client on my four machines with my ownCloud user name, and so far it’s working great!
…and off you go!
But Steve, after all that, I can’t possibly be done, can I? Ha ha! This is the open source world and of course, there’s more tweaking you can do should you feel like it.
I’ll be adding in some additional tweaks here as I tackle them.